How to Set Up Your New Router: A Step-by-Step Guide
So, you just got a new router and you're not quite sure how to set it up. Don't worry, we've got you covered! In this guide, we'll walk you through the process of setting up your new router step by step, so you can get your home network up and running.
What You'll Need
Before you get started, make sure you have the following:
- Your new router
- Ethernet cables
- A power outlet
- A modem
- A computer or smartphone with Wi-Fi capabilities
Step 1: Unbox and Prep Your Router
- Take your new router out of the box and remove any protective packaging.
- Place the router in a central location, ideally in an open space with minimal obstructions for optimal Wi-Fi coverage.
- Connect the power adapter to the router and plug it into a power outlet.
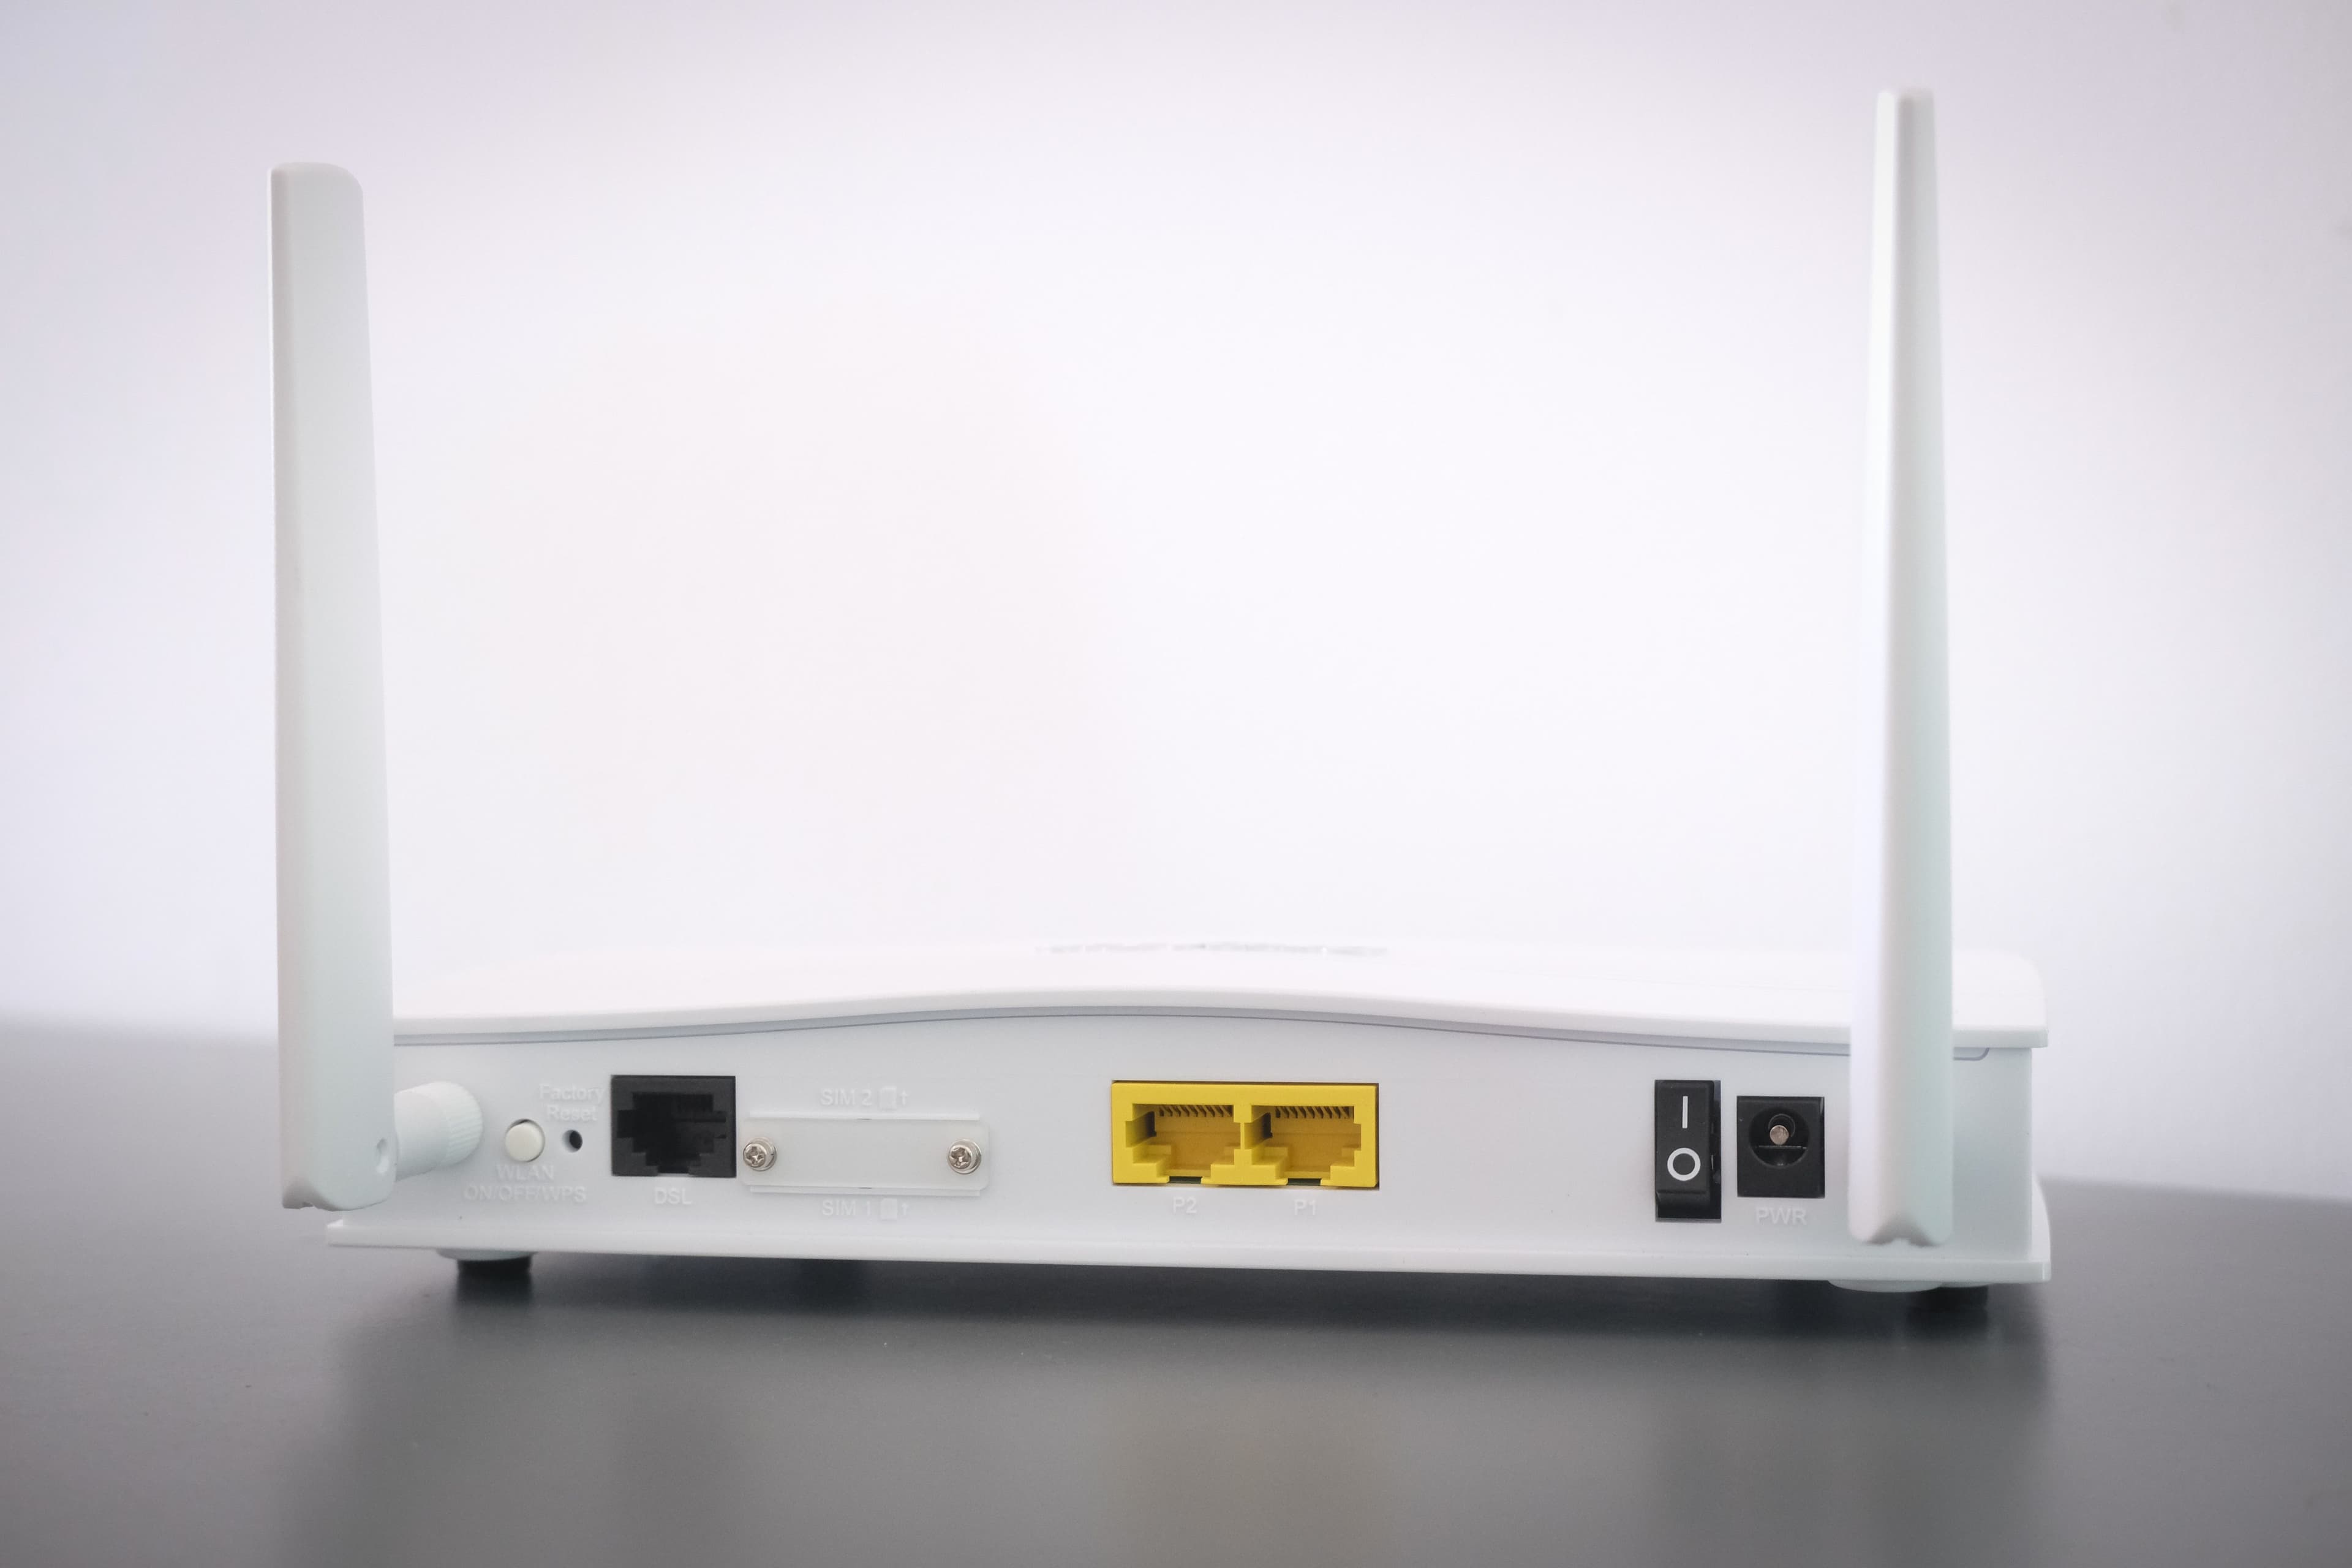
Step 2: Connect to Your Modem
- Locate the "WAN" or "Internet" port on the back of your router. This is the port you'll use to connect it to your modem.
- Use an Ethernet cable to connect the router's "WAN" or "Internet" port to the modem's Ethernet port. Make sure the connections are secure.
Step 3: Turn on Your Router and Modem
- Turn on your router by pressing the power button or plugging it in, depending on the model.
- Turn on your modem if it isn't already on. Some modems don't have a power button, so make sure it's plugged into a power outlet.
Step 4: Connect Your Device to the Router
- On your computer or smartphone, navigate to the Wi-Fi settings and look for your new router's default network name (SSID). This can usually be found on a sticker on your router or in the user manual.
- Connect to this network using the default password, also found on the router or in the user manual.
Step 5: Access the Router's Web Interface
- Open a web browser on your connected device and enter the router's default IP address, typically "192.168.1.1" or "192.168.0.1". Check your router's manual for the correct address if needed.
- You will be prompted for a username and password. Use the default credentials, usually "admin" for both, or as specified in your router's manual.
- You are now in the router's web interface, where you can customize your settings.
Step 6: Customize Your Router Settings
- Change the default Wi-Fi network name (SSID) and password to something unique and secure. Be sure to save your new settings.
- Update the router's firmware to the latest version. This can usually be found in the "System" or "Firmware Update" section of the web interface.
- Enable security features like WPA3 encryption to protect your network from unauthorized access.
- Set up parental controls, guest networks, and other advanced features as desired.
Step 7: Connect Your Devices
Now that your new router is set up, you can connect all your devices to the Wi-Fi network. Enjoy your improved internet connectivity!
Congratulations! You've successfully set up your new router. Remember to periodically check for firmware updates and maintain strong security settings to keep your home network safe and secure.