The Ultimate Guide to Understanding and Fixing Broken Bicycle Spokes
Riding a bicycle is not only an eco-friendly mode of transportation but also a great form of exercise and a fun activity. However, encountering a broken spoke can quickly put a damper on your cycling plans. Broken spokes are a common issue for cyclists, but with the right knowledge and tools, you can fix them yourself, ensuring your ride is smooth and safe. This guide will walk you through understanding and fixing broken bicycle spokes.
Understanding Bicycle Spokes
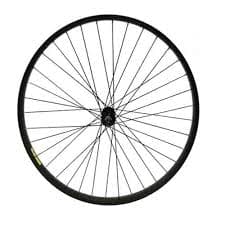
Before diving into the repair process, it's essential to understand what spokes are and their role in your bicycle's functionality. Spokes are the thin rods or wires that connect the rim of your wheel to the hub (the central part of the wheel). They play a crucial role in distributing weight and maintaining the wheel's strength and shape. When a spoke breaks, it can lead to uneven weight distribution, causing the wheel to wobble or become misshapen.
Common Causes of Broken Spokes
Several factors can lead to a broken spoke, including:
- Wear and Tear: Over time, spokes can weaken from constant use and exposure to the elements.
- Poor Maintenance: Failing to regularly check and maintain spoke tension can lead to breakages.
- Impact Damage: Hitting potholes, curbs, or other obstacles can cause immediate spoke damage.
- Overloading: Exceeding the weight limit of your bike can put excessive pressure on the spokes.
Tools You Will Need
To fix a broken spoke, you'll need the following tools:
- Replacement spoke of the correct length and type
- Spoke wrench
- Nipple driver (optional, for easier nipple turning)
- Wire cutters (if trimming is necessary)
Step-by-Step Guide to Fixing a Broken Spoke
Step 1: Remove the Wheel and Tire
First, remove the affected wheel from your bike. Then, deflate the tire and remove it along with the tube to access the spokes.
Step 2: Remove the Broken Spoke
Unscrew the nipple at the rim end of the broken spoke using the spoke wrench. If the spoke is broken at the hub end, you may need to remove the cassette or freewheel to access it.
Step 3: Insert the New Spoke
Thread the new spoke through the hub in the same pattern as the other spokes. Then, guide it through the rim and screw on the nipple lightly by hand. If necessary, use a nipple driver for easier access.
Step 4: Adjust the Tension
Using the spoke wrench, adjust the tension of the new spoke. It should be similar in tension to the spokes around it. Be careful not to over-tighten, as this can lead to further issues.
Step 5: Check Wheel True
Spin the wheel to check for any wobbles. If the wheel is not true, adjust the tension of the surrounding spokes until the wheel spins straight. This step may require patience and minor adjustments.
Step 6: Reassemble and Test
Once the wheel is true, reassemble the tire and tube, and remount the wheel on your bike. Take a test ride to ensure everything feels stable and secure.
Preventing Future Spoke Issues
To prevent future spoke issues, regularly inspect your spokes for signs of wear or damage and ensure they are correctly tensioned. Avoid overloading your bike and try to navigate around obstacles that could impact your wheels.
Conclusion
Fixing a broken spoke may seem daunting at first, but with the right tools and a bit of patience, it's a task most cyclists can handle. Regular maintenance and care can help prevent spoke issues, ensuring your rides are smooth and enjoyable. Remember, safety is paramount, so if you're unsure about performing repairs yourself, don't hesitate to seek professional help.