Complete Guide to Brake System Inspection
Ensuring your vehicle's brake system is in optimal condition is crucial for your safety and the safety of others on the road. A thorough brake system inspection can help identify potential issues before they become serious problems. This guide will walk you through the steps to conduct a comprehensive brake system inspection.
Step 1: Prepare Your Vehicle
Before you begin, ensure your vehicle is parked on a level surface and the engine is turned off. Engage the parking brake for added safety. Gather all necessary tools, including a flashlight, jack, jack stands, tire iron, and gloves. Remember, safety first!
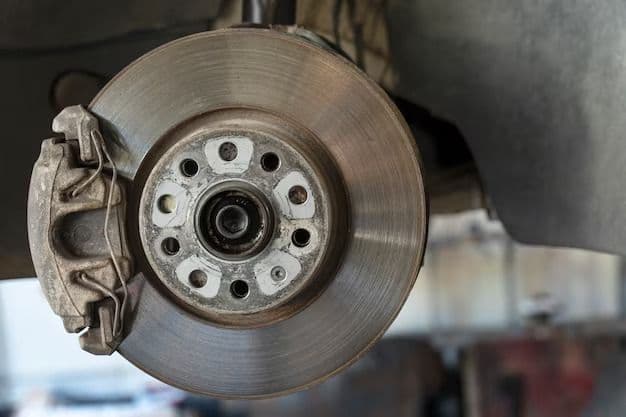
Step 2: Inspect the Brake Pads and Rotors
-
Remove the Wheels: Loosen the lug nuts with a tire iron, lift the vehicle with a jack, and then secure it with jack stands. Remove the wheels to access the brake components.
-
Check Brake Pads: Inspect the thickness of the brake pads. Most pads have a wear indicator that shows when they need replacing. If the pad thickness is less than 1/4 inch (about 6 mm), it's time for a replacement.
-
Examine the Rotors: Look for any signs of wear, such as grooves, cracks, or warping on the surface of the rotors. Use a micrometer to measure the rotor thickness and compare it to the manufacturer's specifications. If the rotor is below the minimum thickness or shows significant wear, it should be replaced.
Step 3: Check the Brake Lines and Hoses
Carefully inspect the brake lines and hoses for any signs of wear, cracks, leaks, or damage. Pay special attention to areas where bends occur, as these are common failure points. Any damaged lines or hoses need to be replaced immediately to prevent brake fluid leaks.
Step 4: Inspect the Brake Fluid
-
Check Fluid Level: Open the brake fluid reservoir and check the fluid level. It should be within the minimum and maximum marks. If it's low, it may indicate a leak in the system.
-
Examine Fluid Condition: Look at the color of the brake fluid. Fresh fluid is typically clear to light yellow, while old or contaminated fluid may appear dark or cloudy. If the fluid is dirty or has been in the system for more than two years, consider flushing and replacing it.
Step 5: Test the Brake Calipers
-
Inspect for Leaks: Check around the brake calipers for any signs of fluid leaks. Leaking brake fluid can compromise the braking system's effectiveness.
-
Check Caliper Movement: Ensure the calipers can move freely. Restricted caliper movement can cause uneven brake pad wear and reduced braking performance. If the calipers are sticking, they may need to be cleaned, lubricated, or replaced.
Step 6: Assess the Brake Master Cylinder
Inspect the brake master cylinder for leaks and ensure it is securely mounted. Check the condition of the master cylinder reservoir and seals. Any signs of leakage or damage require immediate attention.
Step 7: Perform a Brake Test
After inspecting and addressing any issues, conduct a test drive to ensure the brakes are functioning correctly. Listen for any unusual noises and pay attention to the brake pedal feel. If the brakes are still not performing as expected, further investigation or professional assistance may be necessary.
Conclusion
Regular brake system inspections are essential for maintaining your vehicle's safety and performance. By following this guide, you can identify and address potential issues before they lead to more significant problems. Remember, if you're ever unsure about a particular aspect of your brake system, consult a professional mechanic for assistance.